📝 产品详情
Volume Profile Per Candle
| 作者 | Mahmoud Ahmed Abdou Ali |
| 版本 | v3 |
| 激活数 | 5 |
| 原价 | $150 USD |
This is a comprehensive per-candle volume profile / footprint chart indicator for MetaTrader 5, rendered entirely via a canvas overlay (CCanvas). It's a single-file, zero-buffer indicator that draws directly onto the chart window using pixel-level graphics. Here's a complete breakdown:
Core Concept
For every visible candle, the indicator divides the bar's price range into configurable price levels (up to 50) and counts how much trading activity occurred at each level — either from actual tick data, tick volume, or real volume. It then visualizes this "time-at-price" distribution as a heatmap, footprint, or other visual style directly on the chart.
Major Feature Groups
1. Heatmap Rendering (Primary Visual)
The indicator offers 8 display modes for visualizing per-bar volume distribution:
- Filled — solid colored rectangles per price level, color-mapped by intensity
- Gradient — smooth vertical gradient blending within each cell (uses a 4-band approximation for performance)
- Bars — horizontal bars where width represents intensity
- Dots — dot-matrix pattern, density proportional to activity
- Footprint (Bid×Ask) — classic footprint text showing bid and ask volume per level
- Delta — colored rectangles showing net buy/sell imbalance per level
- Total Volume — volume per level with delta-based coloring
- Combined — heatmap intensity background + footprint text overlay
There are 9 color themes: Thermal (blue→red), Magma (black→yellow), Ocean, Forest, Plasma (purple→gold), Inferno, Grayscale, Neon (cyan→magenta), and Custom (user-defined 3-color gradient). A 256-entry color lookup table is pre-built each frame for performance.
2. Volume Data Sources
Three sources are supported:
- Tick volume — standard MT5 tick volume, distributed across levels using a weighted model (body gets more weight than wicks, center of body gets most)
- Real volume — exchange-reported volume where available
- Actual tick data — the most accurate mode. Uses CopyTicksRange() to get real tick-by-tick data, classifies each tick as buy or sell using tick flags first, then a Lee-Ready algorithm fallback (comparing last price to bid/ask, then to previous tick direction). This populates true bid/ask volume per level.
3. POC (Point of Control) & Value Area
- POC — the price level with the highest volume/activity within each bar. When real tick data is available, POC is based on actual traded volume ( totalVol[] ); otherwise it uses tick counts. Four visual styles: solid line, dashed line, arrow marker, diamond marker.
- POC Extension — POC lines can extend rightward beyond the candle, with extension length proportional to the combined heatmap intensity at that price. Uses a thermal gradient that fades out. The extension multiplier is configurable (1×–10×).
- Value Area — the price zone containing a configurable percentage (default 70%) of total volume, computed by expanding outward from the POC. Drawn as a semi-transparent fill with boundary lines (VAH/VAL).
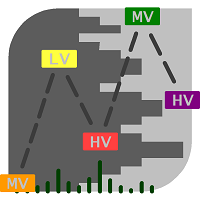
4. High/Low Volume Nodes
- HVN — levels exceeding a threshold percentage of the bar's max activity get a colored border highlight (default: 80% threshold, lime border)
- LVN — levels below a threshold get a different highlight (default: 20% threshold, red border)
5. Order Block Detection (Smart Money Concepts)
A sophisticated hot-zone detection system that identifies institutional order blocks:
Detection method:
- Scans the last N bars (configurable lookback, default 100)
- Builds a bucketed price density map — divides the full price range into tolerance-width buckets and counts how many times price visited each bucket
- Identifies "hot zones" where density exceeds a configurable percentage of the maximum density
- Uses a top-N insertion sort to keep only the strongest MAX_OB (30) candidates
- Checks for overlapping zones and deduplicates
Enhanced scoring (1–10 strength score):
- Impulse detection (0–3 points) — looks for strong directional candles after the OB, scored relative to ATR (2× ATR = 3 pts, 1× = 2 pts, 0.3× = 1 pt)
- Liquidity sweep (0–2 points) — checks if price swept previous swing highs/lows before forming the OB
- Fair Value Gap (0–2 points) — detects FVGs adjacent to the OB (gap between bar[i] low and bar[i+2] high for bullish, ATR-relative minimum gap size)
- Volume confirmation (0–1 point) — OB bar volume vs. 10-bar average (1.2× threshold)
- Intensity (0–1 point) — density relative to max (>0.6 = 1 pt)
- Bar count (0–1 point) — 2–8 bars in the zone scores a point
Mitigation tracking:
- Tracks whether price has re-entered the zone, how deep (mitigationPct 0–100%)
- 50% penetration = mitigated; full through = 100% mitigated
- Breaker block detection — when price fully breaks through an OB, it flips to a breaker
- Retest counting with per-bar deduplication
- Mitigation state persists across rebuilds via a save/restore mechanism
Filtering:
- Minimum touches, minimum volume, minimum strength score
- Maximum range in pips or as ATR multiplier
- OBs can extend forward (configurable bars)
Visual rendering:
- Filled rectangles with opacity adjusted by strength (strong = brighter, mitigated = faded)
- Dashed POC line within the zone
- Labels showing type, bar count, strength score, and status (BREAKER/MIT %)
- Small indicators for FVG, LIQ (liquidity sweep), IMP (impulse pips)
- Strength bar on the right edge (color-coded: red→orange→yellow by score)
- Intensity bar at bottom
6. Swing Arcs
Connects consecutive swing segments with smooth curves weighted by volume intensity:
- Divides the visible range into segments of configurable period (default 8 bars)
- For each segment, collects the POC price (or bar midpoint) at each bar as control points
- Draws a Hermite-interpolated smooth curve through these points
- Adds a parabolic arc offset based on whether the swing is bullish or bearish
- Control point dots are drawn at each bar's intensity peak
- Three line styles: smooth, dashed, dotted
- Optional fill between the arc and a baseline
- Color-coded: bullish = DeepSkyBlue, bearish = Magenta
7. Sub-Bar Intensity Profile
Draws a histogram alongside each candle showing the volume distribution:
- Can appear on the right, left, or both sides of the candle
- Bar width proportional to intensity at each level
- Color intensity also scales with volume
- Optional volume text labels
- Configurable max width and opacity
8. Footprint & Imbalance Analysis
When using footprint display modes:
- Bid×Ask — shows "BidVol × AskVol" at each level
- Delta only — shows signed delta (+/-)
- Volume (Delta) — shows "TotalVol (+Delta)"
- All — shows "Bid × Ask [+Delta]"
Imbalance detection:
- Compares ask volume at level N vs bid volume at level N-1 (buy imbalance)
- Compares bid volume at level N vs ask volume at level N+1 (sell imbalance)
- Configurable ratio threshold (default 1.0 = 100%)
- Highlighted with colored backgrounds and borders
9. Combined Price Heatmap
An aggregate heatmap spanning the full visible range (not per-candle):
- Sums volume from all cached bars (configurable lookback, default 200) into a single profile with 200 price levels
- Drawn as a full-width overlay behind per-bar visuals
- Shows where cumulative volume concentration exists across the visible chart
- Also used for POC extension intensity lookup
10. Higher Timeframe (HTF) Confirmation Panel
Analyzes two higher timeframes simultaneously:
- Auto-selection — automatically picks the next timeframe up (e.g., M15→H1, H1→H4, H4→D1)
- Builds a volume profile on the HTF using the last N bars
- Computes HTF POC, VAH, VAL
- Determines trend direction: BULL/BEAR/NEUTRAL based on close vs. moving average, candle direction, and price vs. POC
- Displays a panel in the top-right corner with trend, POC price, position relative to POC (Above/Below), and VA levels
11. Zoom System
Two independent zoom axes:
- Vertical (PgUp/PgDn) — price zoom, each level narrows the visible price range by 15% (0.85^level), up to 20 levels. Uses CHART_SCALEFIX to lock the price range.
- Horizontal (+/-) — first uses MT5's built-in chart scale (0–5), then adds an "extra zoom" (2×–8×) where every Nth bar is skipped and the remaining bars are drawn wider to fill the space.
12. Y-Axis Calibration
A notable technical detail: the indicator uses ChartTimePriceToXY() to calibrate the actual pixel range of the chart's price area (which is smaller than CHART_HEIGHT_IN_PIXELS due to toolbars/scrollbars). This ensures heatmap cells align precisely with candlesticks.
Performance Architecture
- Hash-based cache — 4096-slot hash table with linear probing and tombstone deletion for O(1) bar data lookup (replaces O(n) linear scan)
- Circular eviction — when cache is full (1200 entries), the oldest entry is overwritten via a circular write index
- Bar X position cache — per-frame cache of up to 2000 bar pixel positions to avoid repeated ChartTimePriceToXY calls
- Color LUT — 256-entry pre-built color lookup table eliminates per-cell floating-point color math
- Pre-computed ARGB — all fixed colors computed once per frame
- Visible-range culling — both bar loop and per-bar level loop skip off-screen elements
- Throttled redraws — configurable minimum milliseconds between redraws (default 100ms) prevents redraw storms during scrolling
- Tick subsampling — when tick count exceeds the configured max (default 5000), ticks are sampled at even intervals with counts scaled by the step size
Event Handling
- OnCalculate — main tick handler, detects new bars, triggers heavy computations (OB/Arc detection, HTF analysis) only on new bars
- OnChartEvent — handles CHARTEVENT_CHART_CHANGE (scroll/zoom), mouse hover for tooltips, and keyboard for zoom controls. Calls RenderFrame() directly for immediate responsiveness.
- OnTimer — millisecond timer that catches scroll changes (mouse drag/wheel) that don't always trigger OnChartEvent, by polling chart state and comparing to previous values
RenderFrame() is fully self-contained — it reads chart state fresh and uses iTime/iHigh/iLow/iClose/iVolume instead of OnCalculate's array parameters, so it can be called from any event handler.
Configuration Summary
The indicator has ~80 input parameters organized into groups: Heatmap, Custom Colors, POC/Value Area, HVN/LVN, Order Blocks (~20 params), Swing Arcs, Sub-Bar Profile, Labels, HTF Confirmation, Chart Appearance, Footprint, Imbalance, Combined Heatmap, and Performance. It's designed to be a single all-in-one volume analysis tool that replaces multiple separate indicators.
安全须知
本产品仅通过 MQL5.com 官方渠道获取。其他渠道版本可能缺少完整功能和技术支持。
EA 配置
| 交易品种 | XAUUSD |
| 时间框架 | H1 (推荐) |
| 推荐经纪商 | IC Markets, IC Trading |
| 最低存款 | $300 / 0.01手 |
📸 截图预览