📝 产品详情
Supply and Demand Zones Professional
| 作者 | Alejandro Miguel Basso |
| 版本 | v4 |
| 激活数 | 5 |
| 原价 | $30 USD |
Professional institutional-grade Supply and Demand zone detection with intelligent alerts
? WHAT IS IT?
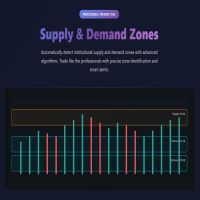
Supply and Demand Zones is a powerful MT5 indicator that automatically identifies high-probability institutional supply and demand zones on any chart. this professional indicator brings advanced zone detection to MetaTrader 5 with enhanced features.
Unlike traditional support and resistance levels, this indicator detects actual institutional footprints - areas where banks and large players entered the market aggressively, creating imbalances that often lead to strong price reactions.
⚡ KEY FEATURES
Automatic Zone Detection
- Smart algorithm identifies zones based on 3-candle patterns + volume surge
- Maximum 5 zones per type to avoid chart clutter
- Adaptive sizing using ATR (Average True Range) for optimal zone height
- Works on all symbols: Forex, Indices, Metals, Crypto, Stocks
Complete Alert System
- ✅ New Zone Created - Never miss a fresh opportunity
- ✅ Price Touches Zone - Get notified at critical decision points
- ✅ Zone Broken - Know when market structure changes
- ✅ Multiple notification methods: Sound, Push notifications, Email
- ✅ No historical alerts - Only alerts for events after initialization
- ✅ Smart duplicate prevention - One alert per zone per event
Visual Intelligence
- Solid zones: Fresh, untouched zones (highest probability)
- Dashed zones: Zones that price has tested (still valid, use with caution)
- Volume Delta labels: Shows institutional conviction strength
- Color-coded: Orange for Supply, Blue for Demand (customizable)
- Auto-extending: Zones project into the future automatically
Professional Quality
- ✅ No repainting - Zones are fixed once created
- ✅ Efficient code - Runs smoothly even on multiple charts
- ✅ Fully customizable - Adjust colors, ATR period, multiplier
- ✅ Complete documentation - 10-page user manual included
- ✅ Multi-timeframe compatible - M5 to D1 (best on M15-H4)
? HOW IT WORKS
Detection Algorithm
The indicator scans for specific patterns that indicate institutional activity:
- 3 consecutive candles of the same color (bullish or bearish)
- Volume surge above average (institutional footprint)
- Reversal point identification - where price strongly rejected
- Zone creation at the origin of the move
Supply Zones form at the BASE of bearish moves (where sellers entered)
Demand Zones form at the BASE of bullish moves (where buyers entered)
Volume Delta Calculation
Each zone displays a Volume Delta value:
- Represents the net buying/selling pressure during zone formation
- Higher absolute values = stronger institutional conviction
- Example: "Demand: 61.087K" means 61,087 units of net buying volume
Interpretation Guide:
< 20K: Weak zone - Use caution 20-50K: Normal zone - Standard probability 50-100K: Strong zone - High probability > 100K: Very strong zone - Premium entry
Zone Management
Creation:
- Zones are created when the pattern completes
- Only the most recent and relevant zones remain
- Cooldown period of 15 bars between detections
Invalidation:
- Supply zones break when price closes above the zone
- Demand zones break when price closes below the zone
- Broken zones are removed immediately
Visual Updates:
- Zones become dashed after 20 bars if price has touched but not broken them
- Maximum of 5 active zones per type (oldest removed first)
? TRADING STRATEGIES INCLUDED
Strategy 1: Zone Bounce
Wait for price to reach a zone, look for rejection candles, enter on confirmation. Perfect for scalping and day trading.
Strategy 2: Break and Retest
Trade the retest of a broken zone (old resistance becomes support). Excellent for capturing strong trends.
Strategy 3: Confluence Trading
Combine zones with Fibonacci levels, round numbers, or moving averages for high-probability setups.
Strategy 4: Multi-Timeframe
Identify zones on H4/D1, execute on M15/H1. Trade only in the direction of the higher timeframe trend.
? WHO IS THIS FOR?
✅ Day Traders - Clear intraday levels for entries and exits
✅ Swing Traders - Major zones for multi-day positions
✅ Scalpers - Quick reactions at institutional levels
✅ Algorithmic Traders - Zones can be read by EAs
✅ All Experience Levels - From beginners to professionals
? ALERT SYSTEM DETAILS
Complete Control
- Master switch: Enable/disable all alerts with one toggle
- Individual controls: Choose which alerts you want
- Multiple delivery methods: Sound, Mobile Push, Email
Alert Message Format
Every alert includes complete information:
TOUCH | Demand Zone | XAUUSD | PERIOD_M15 |
Bar: 2025.01.10 14:45 | Local: 2025.01.10 14:47:23 |
Price: 4465.20
Includes: Event type, Zone type, Symbol, Timeframe, Bar time, Local time, Price level
Smart Alert Logic
- ✅ Only alerts for zones created AFTER indicator initialization
- ✅ No duplicate alerts (one per zone per event type)
- ✅ Alerts sent at bar close (no premature signals)
- ✅ Works 24/7 even when you're away from the computer
? PARAMETERS
Visual Settings
- Supply Color: Default Orange (fully customizable)
- Demand Color: Default DodgerBlue (fully customizable)
Technical Settings
- ATR Period: Default 200 (range 50-500)
- Higher = more stable zones
- Lower = more sensitive to recent volatility
- ATR Multiplier: Default 2.0 (range 1.0-5.0)
- Higher = larger zones (conservative)
- Lower = smaller zones (aggressive)
Alert Settings
- Enable All Alerts (Master switch)
- Alert: New Zone Created
- Alert: Price Touches Zone
- Alert: Zone Broken
- Enable Sound
- Enable Push Notifications
- Enable Email Alerts
? WHAT'S INCLUDED
- Indicator File (.ex5 compiled)
- Complete User Manual (10 pages, PDF)
- Quick Start Guide (2 pages, PDF)
- Strategy Guide with 4 complete trading strategies
- Alert Configuration Tutorial
- Lifetime Updates (free)
- Email Support
? BEST PRACTICES
Recommended Settings by Style
Day Trading (M15-H1):
- ATR Period: 150
- ATR Multiplier: 2.0
- All alerts enabled
Swing Trading (H4-D1):
- ATR Period: 200
- ATR Multiplier: 2.5
- New zone & touch alerts only
Scalping (M5-M15):
- ATR Period: 100
- ATR Multiplier: 1.5
- Touch alerts enabled
Risk Management Tips
- Maximum 1-2% risk per trade
- Stop loss just outside the zone (2-5 pips)
- Minimum 1:2 Risk/Reward ratio
- Don't trade all zones - be selective
- Combine with trend analysis
⚙️ TECHNICAL SPECIFICATIONS
- Platform: MetaTrader 5 only
- Build: 3640+ (recent MT5 versions)
- Programming: MQL5
- Type: Chart indicator
- Repainting: No (zones are fixed)
- CPU Usage: Low (optimized code)
- Multiple Charts: Yes (can run on unlimited charts)
? WHY CHOOSE THIS INDICATOR?
vs Traditional Support/Resistance
❌ S/R: Subjective horizontal lines
✅ This: Objective zones with institutional validation
vs Other S&D Indicators
❌ Others: Basic detection, no alerts, cluttered charts
✅ This: Advanced filtering, complete alert system, clean visualization
vs Manual Zone Drawing
❌ Manual: Time-consuming, inconsistent, emotional
✅ This: Instant, objective, algorithm-based
? PERFORMANCE NOTES
This indicator does NOT predict the future or guarantee profits. It is a tool that identifies high-probability zones based on institutional activity patterns.
Success requires:
- Proper risk management (1-2% per trade)
- Confluence with other analysis
- Entry confirmation (don't blindly trade every zone)
- Patience and discipline
- Practice on demo account first
Typical results:
- 60-70% win rate when combined with proper analysis
- Better performance on liquid markets (major pairs, indices, gold)
- Optimal on M15-H4 timeframes
- Works best during high-volume sessions (London, NY)
? LICENSE & USAGE
- Single License: 1 MT5 account
- Unlimited Usage: Use on unlimited charts and symbols
- No Restrictions: Trade live or demo
- Lifetime License: No recurring fees
- Free Updates: All future versions included
❓ FAQ
Q: Does it work on MT4?
A: No, MT5 only. MT4 version may be developed in the future.
Q: Can I use it with Expert Advisors?
A: Yes, zones are drawn as chart objects that can be read by EAs.
Q: Will it work with my broker?
A: Yes, works with any MT5 broker (Forex, CFD, Futures).
Q: How many charts can I use it on?
A: Unlimited charts with a single license.
Q: Does it repaint?
A: No, zones are fixed once created and don't change in the past.
? GET STARTED TODAY
Transform your trading with professional Supply and Demand detection.
Click "Purchase" to get instant access to:
- The indicator (.ex5 file)
- Complete 10-page manual
- Quick start guide
- All bonuses
- Lifetime updates
- Email support
? VERSION HISTORY
v1.03 (Current)
- Complete alert system implementation
- Push notifications, sound, email
- Smart duplicate prevention
- Enhanced alert messages
v1.02
- Fixed historical processing
- Improved zone invalidation logic
- Performance optimization
v1.01
- Enhanced zone detection accuracy
- Better overlap removal
- Visual improvements
v1.00
- Initial release
- Core S&D detection
- Basic visualization
PURCHASE NOW AND START TRADING INSTITUTIONAL ZONES TODAY!
Disclaimer: Past performance is not indicative of future results. Trading involves substantial risk of loss. Use proper risk management and trade responsibly.
安全须知
本产品仅通过 MQL5.com 官方渠道获取。其他渠道版本可能缺少完整功能和技术支持。
EA 配置
| 交易品种 | XAUUSD |
| 时间框架 | H1 (推荐) |
| 推荐经纪商 | IC Markets, IC Trading |
| 最低存款 | $300 / 0.01手 |
📸 截图预览