📝 产品详情
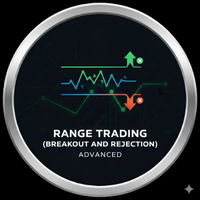
Breakout and rejection range trading
| 作者 | Minh Vuong Pham |
| 版本 | v1.0 |
| 激活数 | 0 |
Breakout Trend Trading Strategy Guide
*** Group support: https://www.mql5.com/en/channels/vuongphamtrading
Core Concepts
The Breakout Trend Indicator identifies two key market behaviors:
- Breakouts: Price breaks through support/resistance levels
- Rejections: Price fails to break through these levels
Indicator Calculations
Top = Highest high of X candles (excluding current) Top1 = Highest high of X candles (including current) Bottom = Lowest low of X candles (excluding current) Bottom1 = Lowest low of X candles (including current) H1 = Top1 - Bottom1 (Range) Buy Trigger = Top1 - 0.3 × H1 (Exit level for uptrends) Sell Trigger = Bottom1 + 0.3 × H1 (Exit level for downtrends)
Visual Elements
| Element | Color | Meaning |
|---|---|---|
| Top/Bottom Lines | Blue/Red | Support/Resistance from X candles |
| Buy/Sell Trigger | Lime/Orange | Trend exit thresholds |
| Purple Arrow ↓ | Purple | Rejection at Top (bearish) |
| Aqua Arrow ↑ | Aqua | Rejection at Bottom (bullish) |
| EMA Line | Yellow | Trend filter |
| MTF Lines | Light colors | Higher timeframe levels |
Breakout & Rejection Rules
Bullish Breakout
Conditions (all must be met):
- ✅ Top1 > Top (new high created)
- ✅ Close > Top (candle closes ABOVE previous Top)
- ✅ Trend State = UPTREND
BEFORE: BREAKOUT: │ 1.2000 ═══ Top │ 1.2015 ─╱ Close at 1.2012 ✓ │ │ 1.2000 ════ Top (Broken!) │ 1.1900 ═══ Bottom │ 1.1900 ═══ Bottom NO TREND → UPTREND CONFIRMED
Bearish Breakout
Conditions:
- ✅ Bottom1 < Bottom (new low)
- ✅ Close < Bottom (closes below Bottom)
- ✅ Trend State = DOWNTREND
Important: Only closing price matters, wicks don't count!
Rejection at Top (Bearish)
Conditions:
- ✅ (high[i] ≥ Top OR high[i+1] ≥ Top) - Either candle touched Top
- ✅ close[i] < Top AND close[i+1] < Top - BOTH closed below Top
- ✅ NOT (Top1 > Top) - No breakout occurred
[i+1]: High 1.2008 ──┐ [i]: High 1.2005 ──┐ │╲ │╲ Top 1.2000 ══════════│═══════════════════════│═══ │ │ Close 1.1993 ──┘ Close 1.1992 ──┘ Purple Arrow → BEARISH REJECTION Bulls failed TWICE → High probability reversal DOWN
Rejection at Bottom (Bullish)
Conditions:
- ✅ (low[i] ≤ Bottom OR low[i+1] ≤ Bottom)
- ✅ close[i] > Bottom AND close[i+1] > Bottom
- ✅ NOT (Bottom1 < Bottom)
Why check both candles? Two consecutive failures = stronger confirmation than single candle rejection.
Entry & Exit Strategies
Entry Methods
1. Breakout Entry
- LONG: Enter when candle closes above Top, or wait for pullback to Buy Trigger
- SHORT: Enter when candle closes below Bottom, or wait for pullback to Sell Trigger
2. Rejection Entry
- Aggressive: Enter at next candle after rejection arrow appears
- Conservative: Wait for confirmation candle that breaks high/low of rejection candle
3. Multi-Timeframe Confirmation (Highest probability)
Required conditions:
- ✅ Current timeframe shows valid signal
- ✅ MTF shows SAME direction trend (or neutral)
- ✅ EMA confirms direction (if enabled)
Exit Methods
1. Trigger Break (Primary Exit)
- LONG: Exit when price closes BELOW Buy Trigger
- SHORT: Exit when price closes ABOVE Sell Trigger
- Why: 30% retracement indicates weakening trend
2. Opposite Signal
- Exit LONG when Rejection at Top appears (Purple arrow)
- Exit SHORT when Rejection at Bottom appears (Aqua arrow)
3. Take Profit Targets
Based on Range (H1):
- Conservative: 1.0 × H1
- Moderate: 1.5 × H1
- Aggressive: 2.0 × H1
Scale-out Strategy: Close 1/3 at each target level
Risk Management
Position Sizing Formula
Risk per trade = 1-2% of account Position Size = (Account × Risk%) / (Stop Loss in pips × Pip Value) Example: Account: $10,000 Risk: 2% = $200 Stop Loss: 100 pips Pip Value (1 lot): $10/pip Position Size = $200 / (100 × $10) = 0.2 lots
Stop Loss Placement
Breakout Trades:
- LONG: Place SL below Bottom (with small buffer)
- SHORT: Place SL above Top (with small buffer)
- Reason: If price returns to these levels, breakout failed
Rejection Trades:
- SHORT (Rejection at Top): SL above rejection high + buffer
- LONG (Rejection at Bottom): SL below rejection low + buffer
Risk-Reward Ratios
| Strategy Type | Minimum R:R | Recommended R:R |
|---|---|---|
| Breakout with MTF | 1:1.5 | 1:2 |
| Breakout without MTF | 1:2 | 1:3 |
| Rejection trade | 1:2 | 1:3 |
Multi-Timeframe Rules
MTF Trading Principles:
-
Align with MTF Trend
- ✅ GOOD: M15 Uptrend + H1 Uptrend
- ❌ BAD: M15 Uptrend + H1 Downtrend
-
MTF as Support/Resistance
- Take profit before MTF Top/Bottom
- Expect reactions at MTF levels
-
MTF Timeframe Selection
| Current TF | Recommended MTF | Ratio |
|---|---|---|
| M5 | M15-M30 | 3-6x |
| M15 | H1-H4 | 4-16x |
| H1 | H4-D1 | 4-24x |
Trade Examples
Example 1: Successful Breakout Trade
Setup: M15 timeframe, X=20
1. Range: Top=1.2000, Bottom=1.1900, H1=100 pips 2. Breakout: Close at 1.2012 (above Top) ✓ 3. MTF Check: H1 = UPTREND ✓, MTF Top at 1.2200 ✓ 4. Entry: 1.2015 5. Stop Loss: 1.1895 (below Bottom) = 120 pips risk 6. Targets: TP1=1.2115, TP2=1.2165 7. Result: +133 pips average
Outcome: ✅ WIN
Example 2: Rejection Reversal
Setup: H1 timeframe, Rejection at Top
1. Pattern: Both [i] and [i+1] touched 1.2000 Top 2. Both closed below Top (1.1993, 1.1992) 3. Purple arrow appears 4. Entry SHORT: 1.1985 5. Stop Loss: 1.2015 (above rejection) = 30 pips 6. Targets: TP1=1.1930, TP2=1.1900 7. Result: +70 pips average
Outcome: ✅ WIN
Example 3: Failed Trade (Learning)
Mistake: Ignored MTF warning
1. M15: Breakout above 1.2000 ✓ 2. MTF: H1 = DOWNTREND ❌ (IGNORED!) 3. MTF Top at 1.2020 ❌ (Very close!) 4. Entry LONG: 1.2010 5. Price hit MTF resistance, reversed 6. Exit at Buy Trigger: 1.1990 7. Result: -20 pips
Outcome: ❌ LOSS
Lesson: ALWAYS check MTF before entering
Common Mistakes
1. Ignoring the Close
- ❌ WRONG: "High touched Top, entering long!"
- ✅ CORRECT: Wait for CLOSE above Top to confirm
2. No Stop Loss
- ❌ "I'll wait for it to come back..." → Account blown
- ✅ ALWAYS place stop loss BEFORE entering
3. Revenge Trading
- ❌ After loss: Double position to "win it back" → Bigger losses
- ✅ Analyze what went wrong, maintain same risk per trade
4. Overtrading
- ❌ Taking every signal, 40-50% win rate, exhausted
- ✅ 2-3 high-probability setups per day, 60-70% win rate
5. Ignoring MTF
- ❌ "M15 looks perfect!" (ignores H1 downtrend) → Gets crushed
- ✅ Only trade when MTF aligns or is neutral
6. Wrong Position Sizing
- ❌ Fixed lot size regardless of stop distance
- ✅ Risk 1-2% per trade based on actual SL distance
Quick Reference Checklists
Before LONG Entry (Breakout):
- [ ] Top1 > Top
- [ ] Close > Top
- [ ] MTF = Uptrend or Neutral
- [ ] Not at MTF Top resistance
- [ ] Stop loss set at/below Bottom
- [ ] Position size = 1-2% risk
- [ ] R:R minimum 1:1.5
Before SHORT Entry (Breakout):
- [ ] Bottom1 < Bottom
- [ ] Close < Bottom
- [ ] MTF = Downtrend or Neutral
- [ ] Not at MTF Bottom support
- [ ] Stop loss set at/above Top
- [ ] Position size = 1-2% risk
- [ ] R:R minimum 1:1.5
Before LONG Entry (Rejection):
- [ ] Aqua arrow appeared
- [ ] Both candles tested Bottom
- [ ] Both closed above Bottom
- [ ] No breakdown occurred
- [ ] Stop below rejection lows
- [ ] R:R minimum 1:2
Before SHORT Entry (Rejection):
- [ ] Purple arrow appeared
- [ ] Both candles tested Top
- [ ] Both closed below Top
- [ ] No breakout occurred
- [ ] Stop above rejection highs
- [ ] R:R minimum 1:2
Parameter Settings
X Value (Lookback Period)
| X Value | Best For | Characteristics |
|---|---|---|
| 10-15 | Scalping M5-M15 | More signals, less reliable |
| 20-30 | Day trading M15-H1 | Balanced (DEFAULT) |
| 40-50 | Swing trading H4-D1 | Fewer signals, more reliable |
Recommended Settings by Style
Conservative Trader:
X = 30 ShowMTF = true MTFTimeframe = H4 or higher ShowEMA = true, EMALength = 50 Only trade with full MTF + EMA confirmation
Aggressive Trader:
X = 15 ShowMTF = true MTFTimeframe = H1 ShowEMA = true, EMALength = 20 Can trade with partial confirmation
Beginner:
X = 20 (default) ShowMTF = true MTFTimeframe = one level higher ShowEMA = true, EMALength = 20 ONLY trade with full MTF confirmation Start with minimum position size
Key Success Factors
Do: ✅ Wait for proper close confirmation
✅ Always check MTF before entering
✅ Use rejection signals for reversals
✅ Respect trigger levels for exits
✅ Manage risk on EVERY trade
✅ Keep a trading journal
Don't: ❌ Trade based on wicks alone
❌ Enter without stop loss
❌ Ignore MTF warnings
❌ Revenge trade after losses
❌ Risk more than 2% per trade
❌ Overtrade in ranging markets
Final Tips
Trading Psychology:
- Trust the system, follow rules mechanically
- Accept losses as part of the game (40-50% loss rate is normal)
- Quality over quantity - wait for best setups
- Journal every trade to improve
Risk Management:
- Never risk more than 2% per trade
- Always use stop losses
- Don't move stops away from entry
- Scale out at profit targets
Market Conditions:
- Best in trending markets
- Avoid choppy/sideways markets
- Wait for volatility if too quiet
- Use higher timeframes in low volatility
Remember: No indicator is 100% accurate. Focus on process, not individual results. Let your edge play out over hundreds of trades.
Quick Summary
This strategy identifies:
- Breakouts when price closes beyond Top/Bottom levels
- Rejections when price fails to break these levels (both candles must fail)
Entry priorities:
- MTF confirmation (highest probability)
- Breakout entries (momentum)
- Rejection entries (reversal)
Exit when:
- Price closes beyond trigger levels (30% retracement)
- Opposite signal appears
- Profit targets hit
Success formula:
- Right setup + Right timing + Right risk = Consistent profits
Good luck and trade safely! ??
安全须知
本产品仅通过 MQL5.com 官方渠道获取。其他渠道版本可能缺少完整功能和技术支持。
EA 配置
| 交易品种 | XAUUSD |
| 时间框架 | H1 (推荐) |
| 推荐经纪商 | IC Markets, IC Trading |
| 最低存款 | $300 / 0.01手 |
📸 截图预览